
9 Free Tips and Tricks to Try in Windows 10
1. Access secret key safeguarded applications, benefits quicker
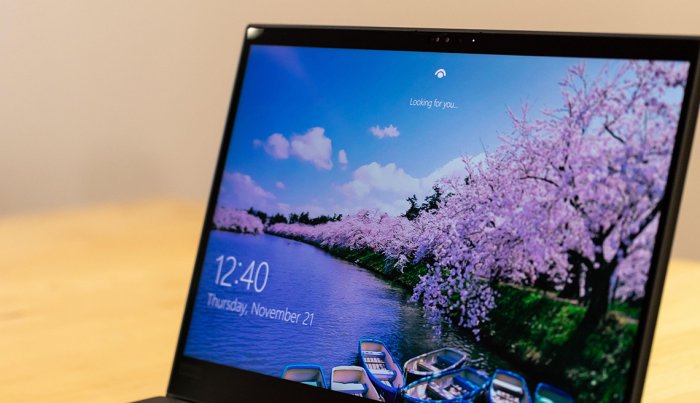
Windows Hi is a quicker and safer method for signing on to your Windows 10 gadget and access any secret key safeguarded applications or online administrations. It utilizes something special about you, like a finger impression or your face. Or on the other hand you can utilize a safe individual ID number (PIN) in the event that you don’t have a camera or unique mark peruser.
This is the way to set it up.
- Go to the Beginning menu, which seems to be a calculated four-paned window, at base left of your screen.
- Select Settings | Records | Sign-in choices.
- Under Oversee how you sign into your gadget, select a Windows Hi thing to add, change or eliminate.
2. Drag two applications one next to the other, four in quarters
Windows 10 makes it simple to open numerous windows on your screen, so you can peruse the web on one half while playing recordings on the other half. By “snapping” or getting them into place, you’ll have no covering windows.
To snap with a mouse:
- Snap and hold the title bar of the window you need to snap, like an internet browser.
- Drag it left or right to one of the edges of your screen. A framework shows the area and state of the window once you drop it.
- Give up and it will be snapped set up. Presently click one of the other open windows, which you’ll see as thumbnails, and it will fill the other portion of the screen.
You additionally can snap windows into quarters. To escape that mode, limit a window by tapping on the short symbol (- ) in the upper right corner of three symbols, make it full screen by tapping on the square boost symbol or close the program completely by tapping on the X.
To snap with a console, select the window you need to snap and press the Windows logo key and left bolt all the while or the Windows logo key and right bolt to snap the window to your favored side of the screen.
3. Modify the vibe of Windows 10
You can make the appearance of Windows 10 turn out better for you in more ways than one.
To change size of text:
- Select the Beginning button, then Settings | Simple entry | Show.
- Utilize the slider under Make text greater to make the text on your screen bigger. Or on the other hand select a choice starting from the drop menu under Make everything greater to change the size of the relative multitude of components on your screen.
- On the off chance that you don’t see sufficient difference among the components on your screen, take a stab at utilizing a high differentiation topic. Select the Beginning button, then, at that point, Settings | Simple entry | High differentiation, and snap on the switch under Turn on high difference.
To make the applications in your Beginning menu seem bigger, ok snap or tap and hold the application tile you need to resize, select Resize, and pick the size you need.
To see the mouse pointer better, select the Beginning button, then, at that point, Settings | Straightforward entry | Mouse pointer, and pick the choices that turn out best for you.
By adding “pointer trails” you can see where your mouse is continuing on the screen.
1. Select the Beginning button, then, at that point, Settings | Gadgets | Mouse | Extra mouse choices.
2. In the Mouse properties window, select the Pointer choices tab | Show pointer trails | alright.
Windows 10 likewise allows you to amplify your screen to see words and pictures better. To open Magnifier rapidly, press the Windows logo key and in addition to sign (+). At the point when Magnifier is open, use Windows logo key and in addition to sign (+) or Windows logo key and short sign (- ) to zoom in or out. To close Magnifier, press Windows logo key and Esc.
4. Use Cortana, Microsoft’s own associate
Cortana is Microsoft’s advanced collaborator that assists you with different errands. Think about her like Amazon’s Alexa, Apple’s Siri or Google Associate however prepared into Windows 10.
You probably were inquired as to whether you needed to empower Cortana when you set up Windows 10 interestingly. On the off chance that not, this is the way to get everything rolling:
1. Enact Cortana by tapping or clicking Start | Cortana.
2. Select Use Cortana. Click Yes on the off chance that you need discourse, inking (support for a computerized pen) and composing personalization turned on. This assists Cortana with getting to realize you better and can help her total different undertakings. You likewise can pick Pass in the event that you don’t need this element turned on.
3. Cortana currently sits on your assignment bar at the lower part of your screen. You can awaken her by saying “Hello, Cortana,” That’s what assuming you empowered or by tapping the Cortana symbol on the taskbar, which seems to be a circle, and is to one side of the inquiry window.
After you’ve stirred her, have a go at inquiring, “What can really be done?”
Cortana can assist with dealing with your schedule and stay up with the latest, join a gathering in Microsoft Groups or figure out who your next gathering is with, make and oversee records, set updates and cautions, and track down realities, definitions and other data.
Know: Cortana requests consents to follow your action so it tends to be valuable, and Microsoft makes it challenging to absolutely incapacitate Cortana whenever you’ve empowered it. So be certain you wouldn’t fret that following.
5. Quit composing and begin directing
Rather than writing down a note or composing a paper, you can converse with your PC. You additionally have some control over your PC by addressing it, like beginning projects, opening menus and clicking buttons.
To get rolling:
1. Type Discourse in the hunt window adjacent to the Beginning symbol. Press Enter or tap the button that says Windows Discourse Acknowledgment | Next.
2. Pick the sort of mouthpiece you’re utilizing, like a headset, work area receiver or maybe one that is incorporated into the actual PC. Click Straightaway.
3. Stroll through the prompts, direct a short sound test, then, at that point, ensure the switch is set to On next to Direct text and control your gadget utilizing your voice.
4. Place your cursor in any text field, either straightforwardly inside Windows 10 or in an application like Microsoft Word. Press the Windows logo key and H and begin talking into your PC’s mouthpiece.
6. Get back to past exercises with Course of events
With Windows 10’s Course of events, you can rapidly travel once again into the past to get to documents and media you recently chipped away at. Whether you began composing a report yesterday or you need to hit up a video from as long as 30 days prior, Timetable makes it simpler to find what you’re searching for.
1. Click the Errand view symbol in the undertaking bar at the lower part of your screen, to one side of the pursuit window, to see all your new exercises. Or on the other hand open Assignment view by squeezing the Windows logo key and Tab.
2. See previews of the most pertinent exercises as little windows you can tap or tap on in the default view. Besides you can slide the scrollbar on the option to return to past exercises. You additionally can get what you were doing in Microsoft Edge or Office 365 on your iOS or Android gadget.
3. Can’t find the specific movement you’re searching for in the default view? Search involving pertinent watchwords in the upper right corner.
To close the element, tap the Departure (esc) key at the upper left on your console until you’ve pulled out and have gotten back to your past screen.
7. Utilize the free OneDrive to save records
OneDrive is Microsoft’s cloud administration, a web-based vault of sorts, to store documents offsite. That holds them back from vanishing assuming that your PC’s hard drive has issues or your PC is hurt in a fire or other calamity. Besides, you can get to records and frequently run them in the cloud. Furthermore, you can work together with others somewhere else continuously.
Microsoft gives you 5 gigabytes (GB) of free stockpiling. However, Microsoft 365 clients, who pay for plans that beginning at $69 per year, get around 1,000 GB of OneDrive stockpiling included. Microsoft 365 incorporates Succeed, Standpoint, PowerPoint and Word. You can purchase more internet based capacity.
Windows 10 coordinates OneDrive, so you can relocate among neighborhood and OneDrive envelopes in Windows Wayfarer, as though every last bit of it were put away on your PC. A Web association is required.
Type OneDrive in the hunt window at the lower part of the screen or snap Start | OneDrive. You might be incited to sign into your OneDrive record with a legitimate Microsoft or Hotmail ID, however that is required just a single time.
Presently, when you’re in Document Wayfarer, you can click OneDrive on the passed on side to see the items in your web-based capacity. Or on the other hand right-click on a record with your mouse and select Move to OneDrive. You can likewise go to OneDrive .com to sign in an entrance your records or download the OneDrive application for your cell phone or tablet.
8. Share documents with neighboring gadgets
You can right away share records like reports, photographs, recordings and sites with other close by Windows 10 gadgets by means of Bluetooth or Wi-Fi. To empower the Close by sharing component:
1. Type Close by in the hunt box at the lower part of your screen
2. Tap or snap Close by sharing settings and select the switch to turn it on.
3. Presently decide to share or get content from Everybody close by or My gadgets just starting from the drop menu. As a matter of course, shared documents you get will be dropped into the Downloads envelope, however you can change the objective.
Share content when you’re in an upheld application like Record Pioneer, Microsoft Edge or Photographs by right-tapping on a document and picking Offer. You’ll see a rundown of gadgets in Bluetooth range with the Close by Sharing component empowered. The beneficiary will be advised in the Activity Community and provoked to acknowledge or decline.
9. Quiet interruptions with Center Help
Center Help assists you with effectively hindering notices, sounds and cautions to establish an interruption free climate. This can help while you’re attempting to focus on a work project for a little while.
1. Type center in your hunt bar.
2. Snap or tap to open Center Help.
From that point, you can set a few programmed rules, for example, Spotlight Help turning itself on and off at specific times or you can flip Spotlight Help on and off physically. Know you likewise can focus on warnings, so select individuals and significant applications generally get through when Spotlight Help is turned on.
When Center Help switches off, you’ll get synopsis of the multitude of warnings and alarms you missed. To guarantee this is empowered, actually look at the crate next to


